DSLR Basics & Exposure Triangle

Scripture
- James 1:17 – “Every good and perfect gift is from above, coming down from the Father of lights.”
- Connect photography to capturing the “light” that God created.
Photography, at its core, is the art of capturing light. Cameras cannot function without light—whether it’s the sun, a lamp, or even the stars. In the same way, our lives cannot function apart from the light of God. When we take a photo, we are literally working with the very element that God created on the first day: “Let there be light” (Genesis 1:3).
Course Content
Review Last Week
- Students share the 1–2 photos they brought in.
- Quick recap of the scavenger hunt experience.
- Today’s focus: How cameras work to capture light.
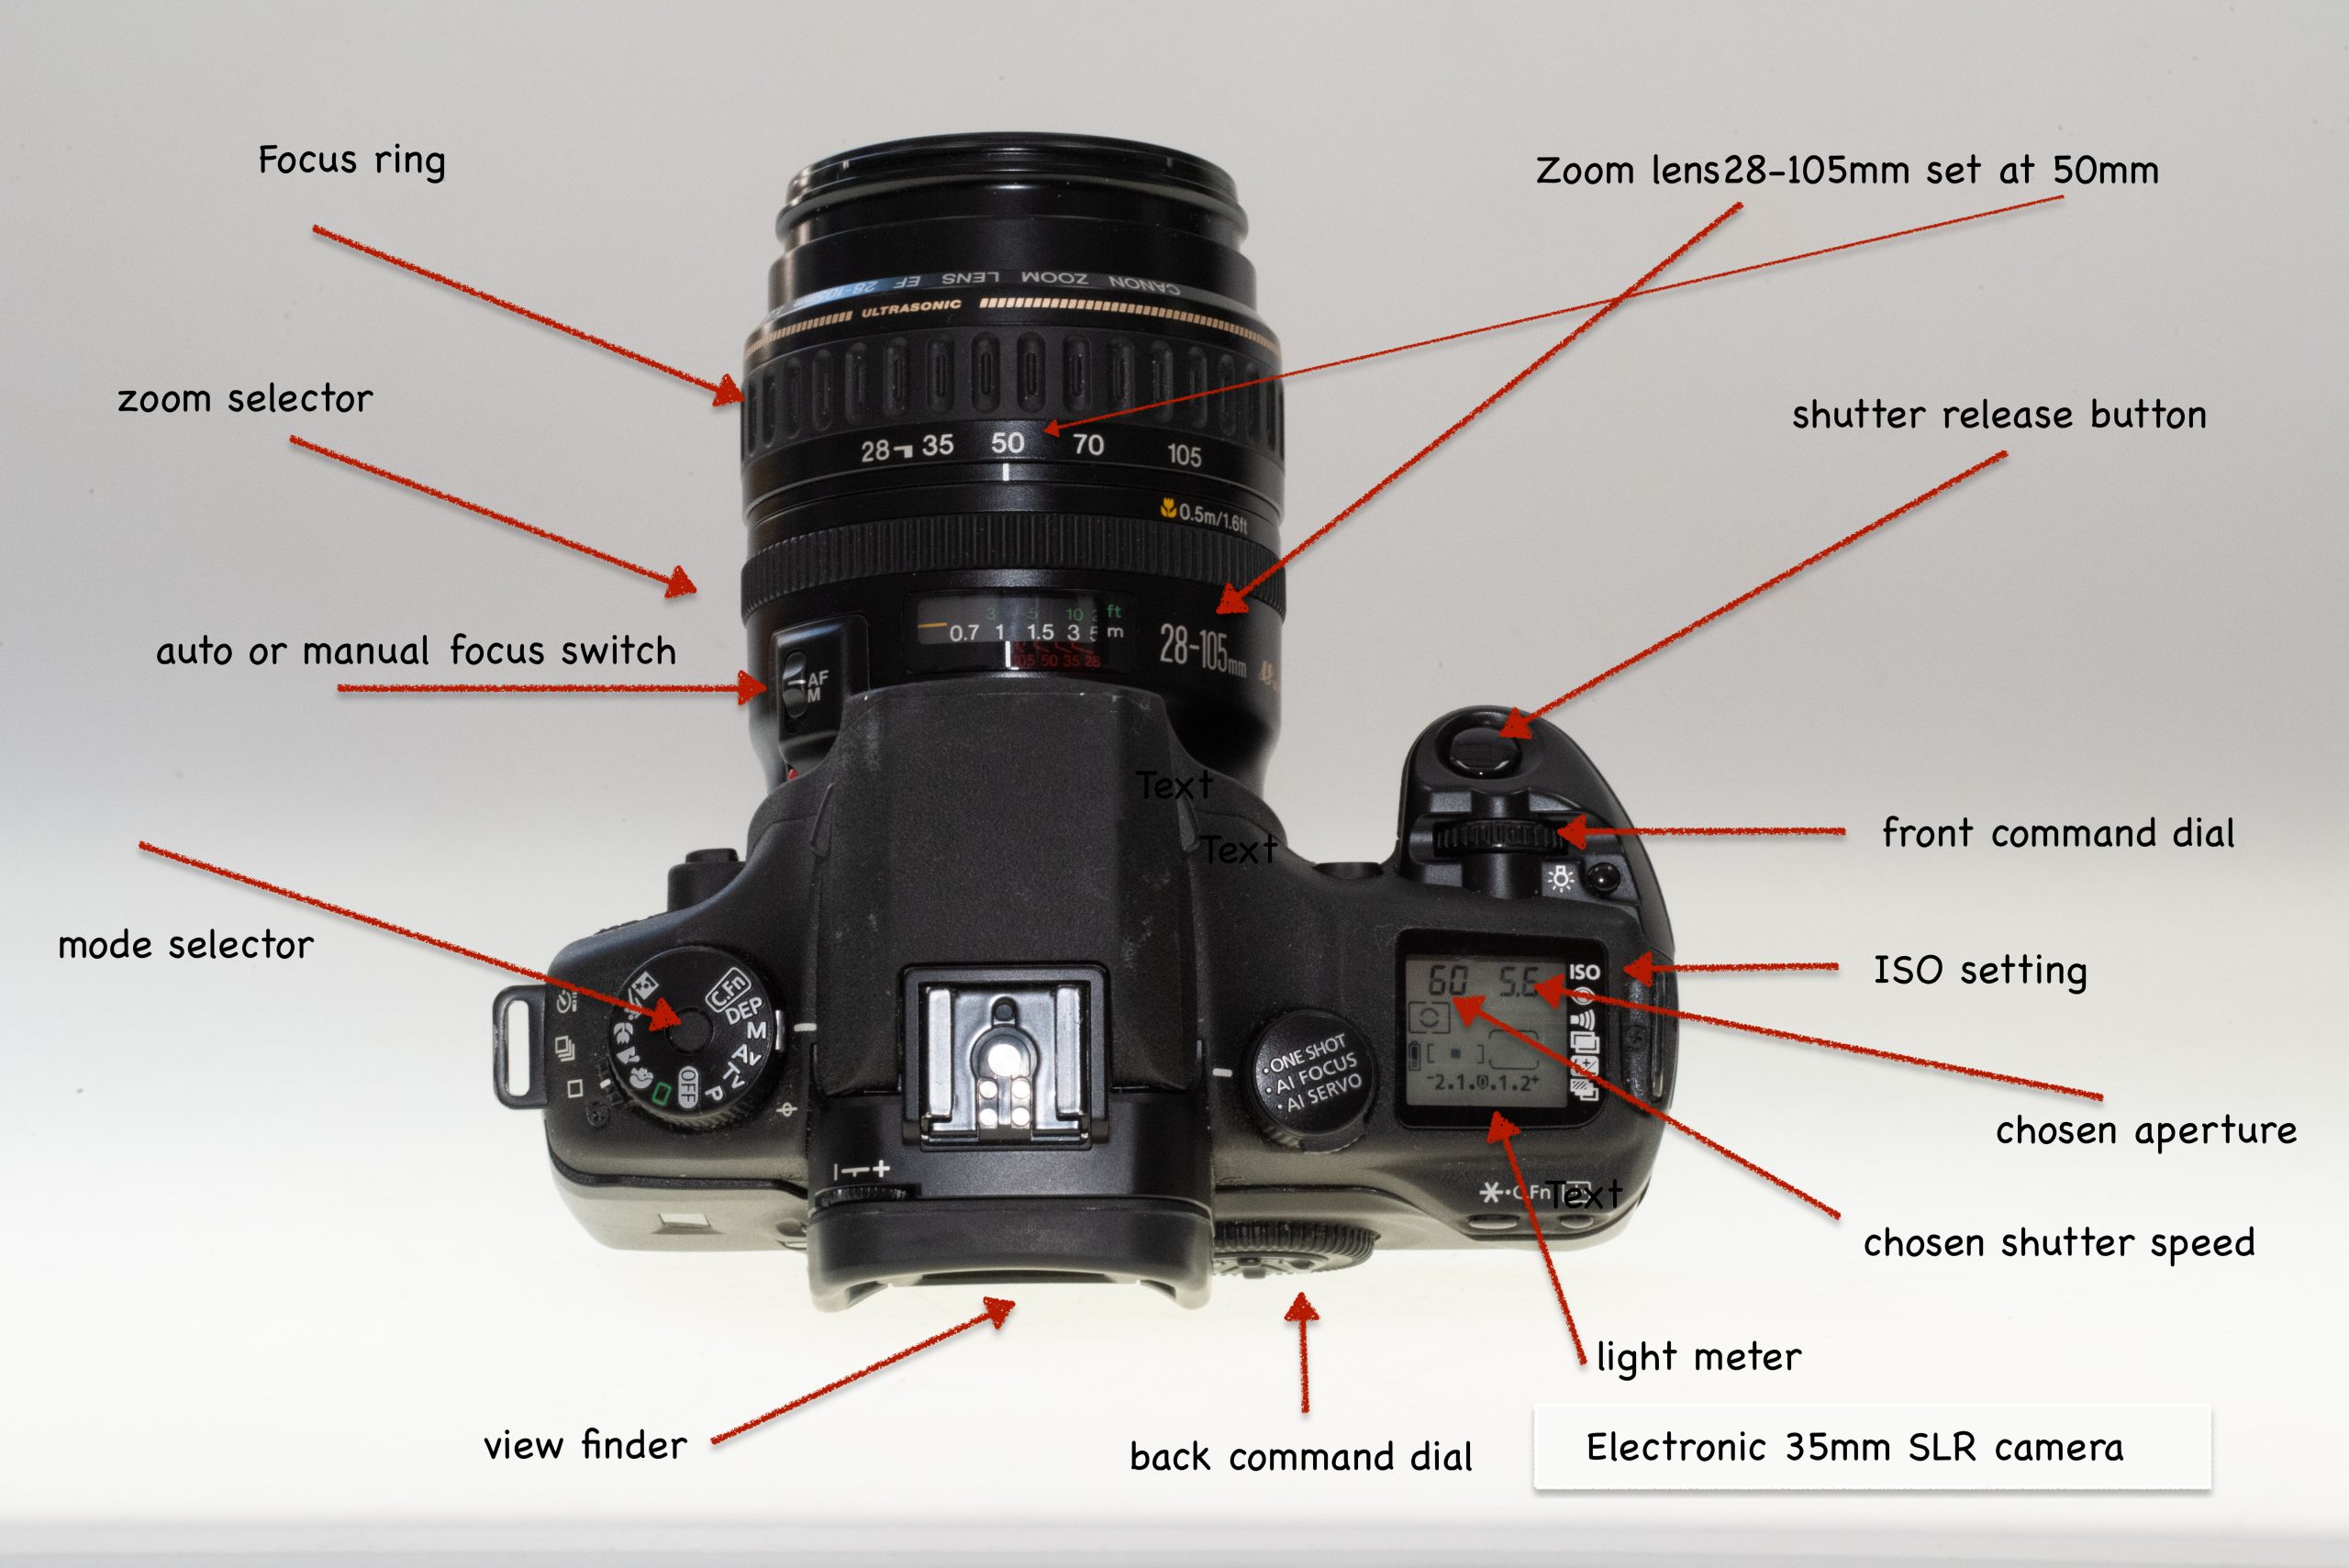
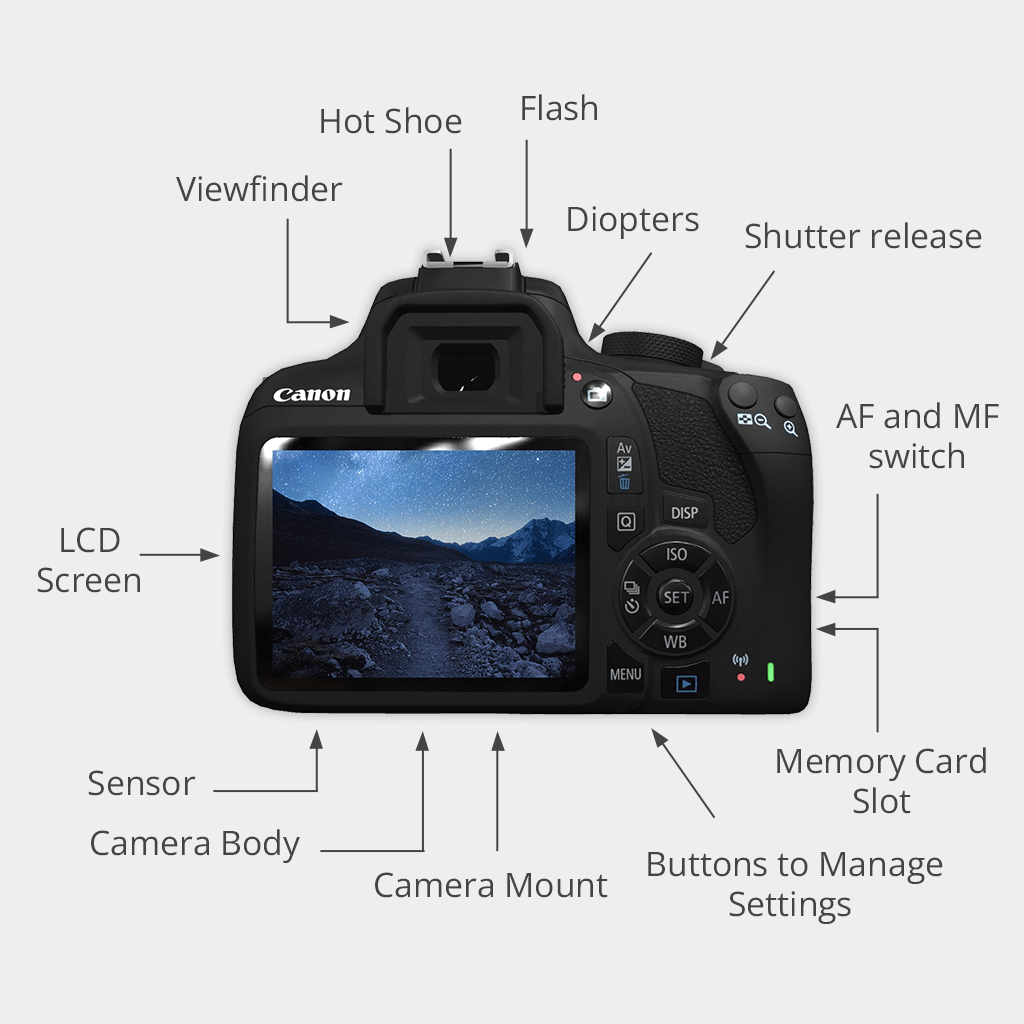
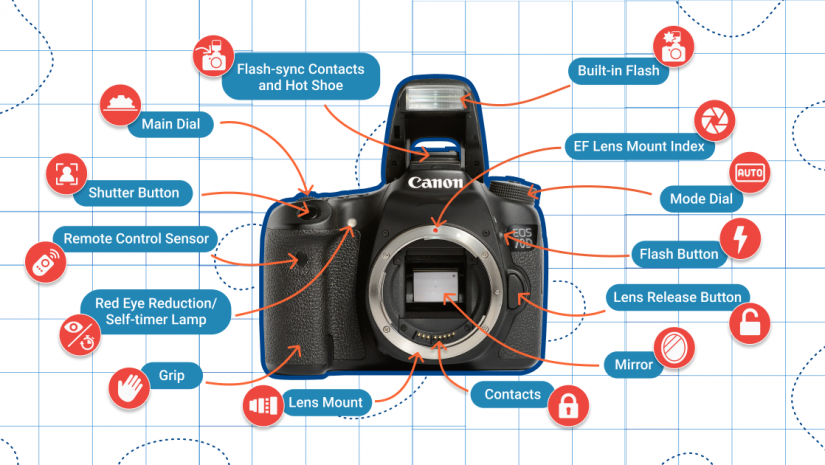
Camera Anatomy
- Show parts of a DSLR:
- Lens
- Viewfinder
- Mode dial
- Shutter button
- LCD screen
- Have students point to each part on their own cameras.
If students have cell phones, show where similar settings are located in manual/pro mode.
The Exposure Triangle Explained
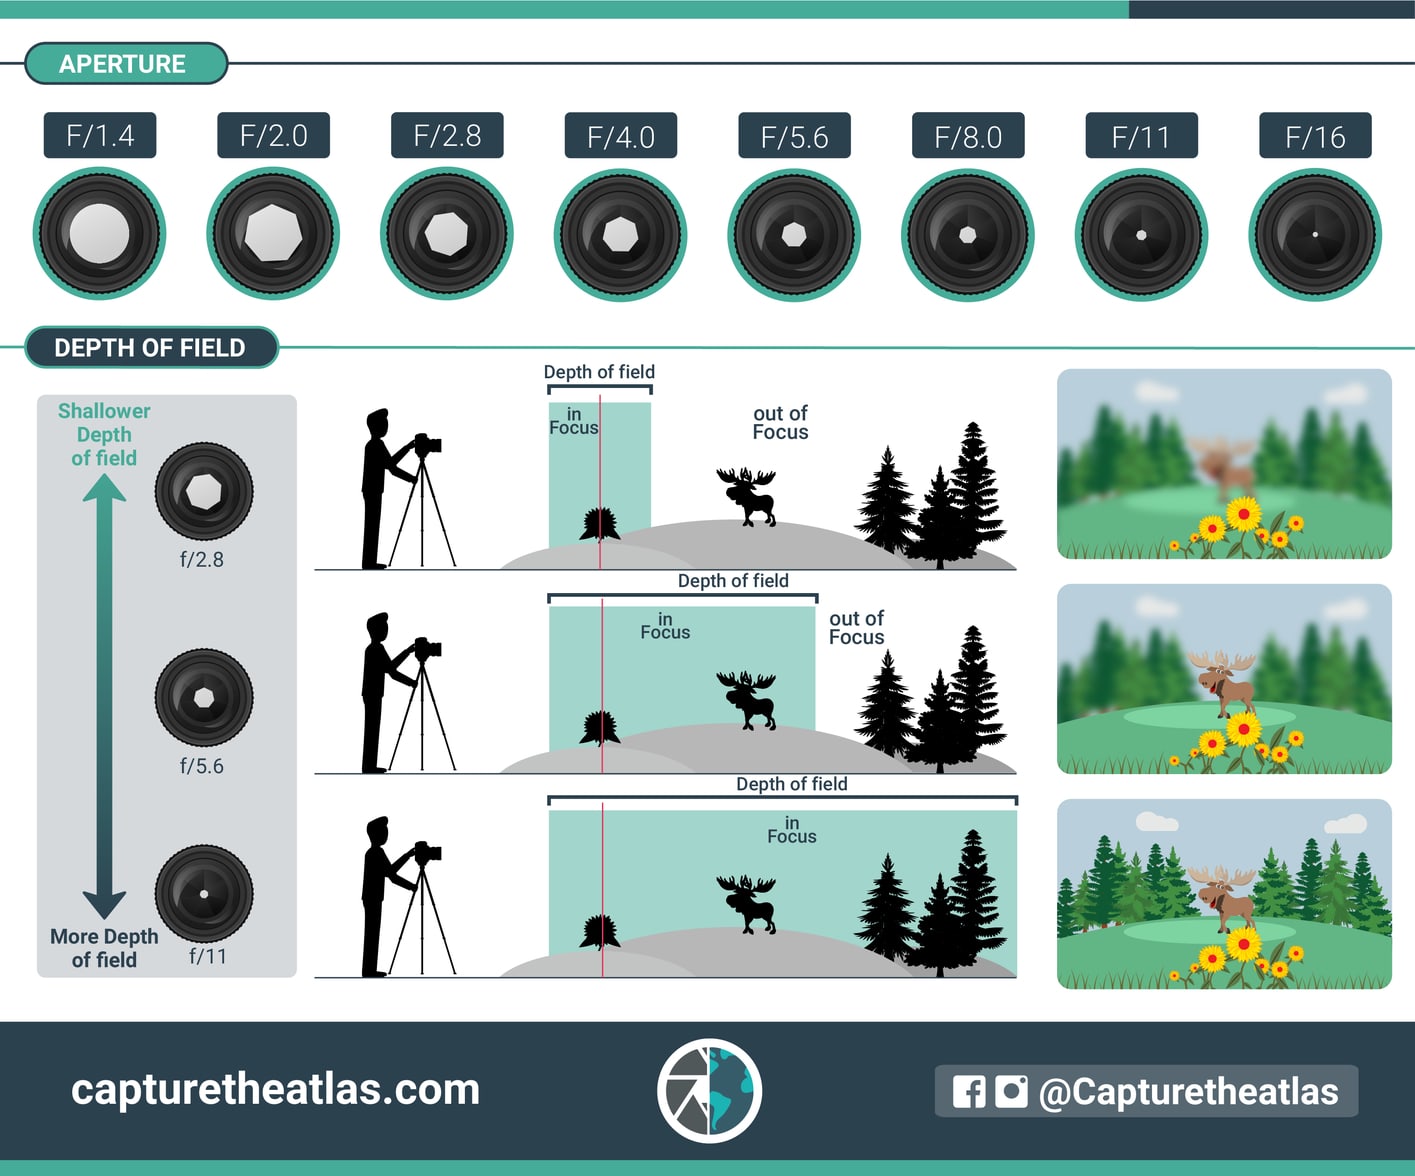
- Aperture (f-stop) – Controls how much light enters; affects depth of field (blurry background vs sharp focus).
- Example: f/2.8 portrait with blurry background vs f/11 landscape sharp front to back.
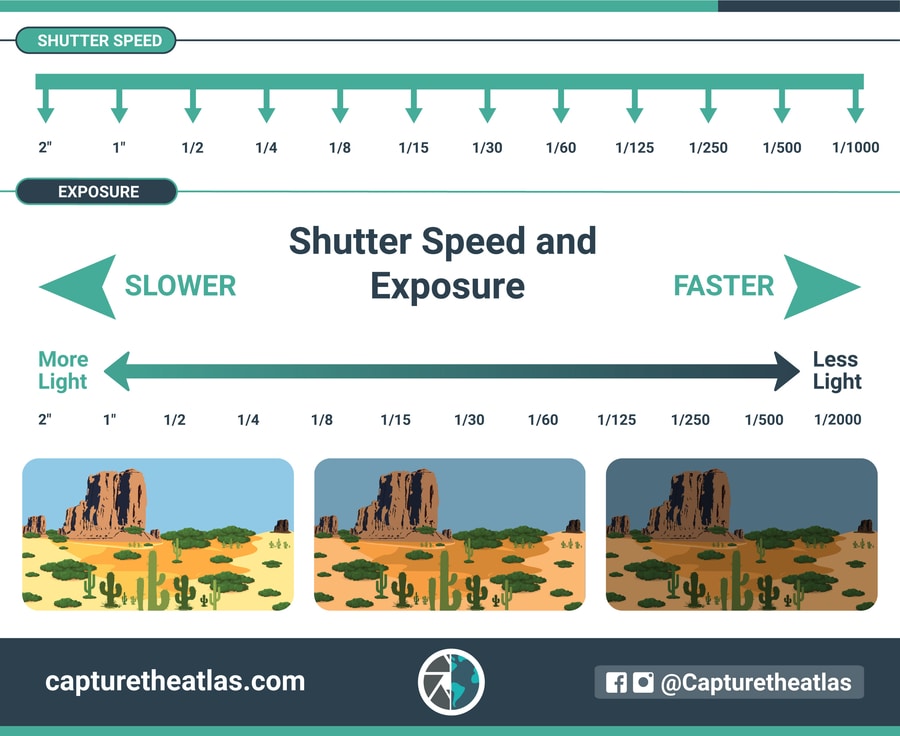
- Shutter Speed – Controls how long light hits the sensor; affects motion blur or freeze.
- Example: 1/1000 sec freezing sports vs 1/10 sec creating motion blur in water.
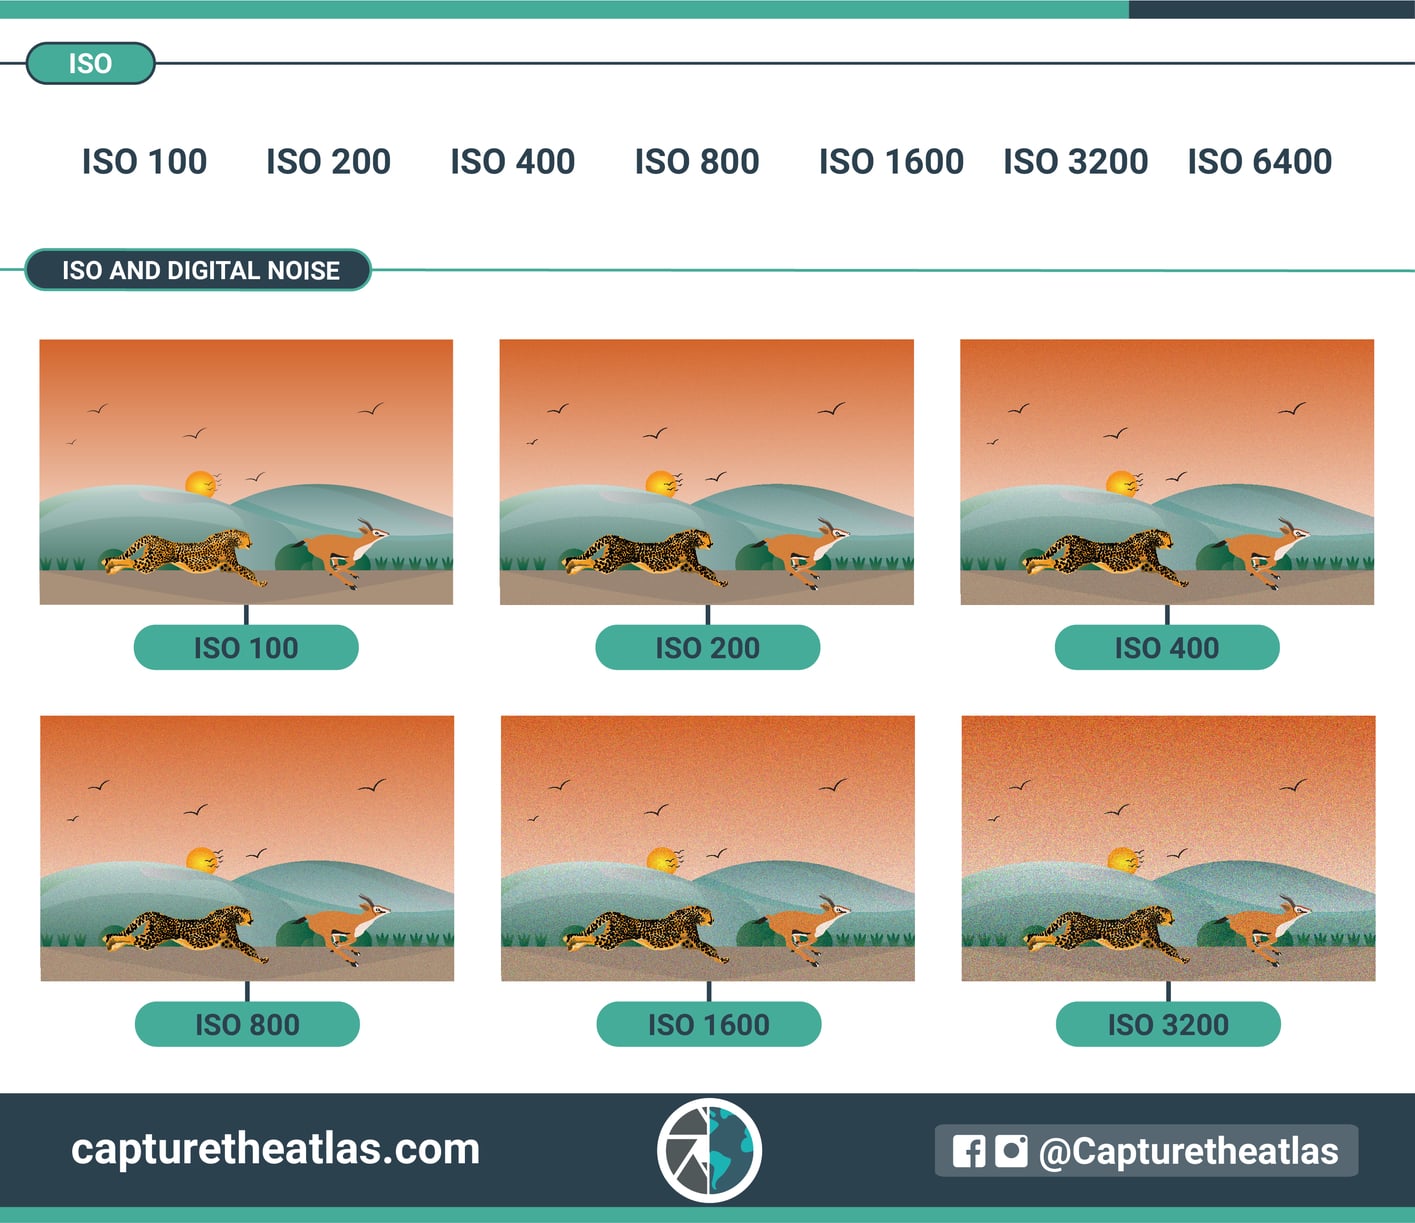
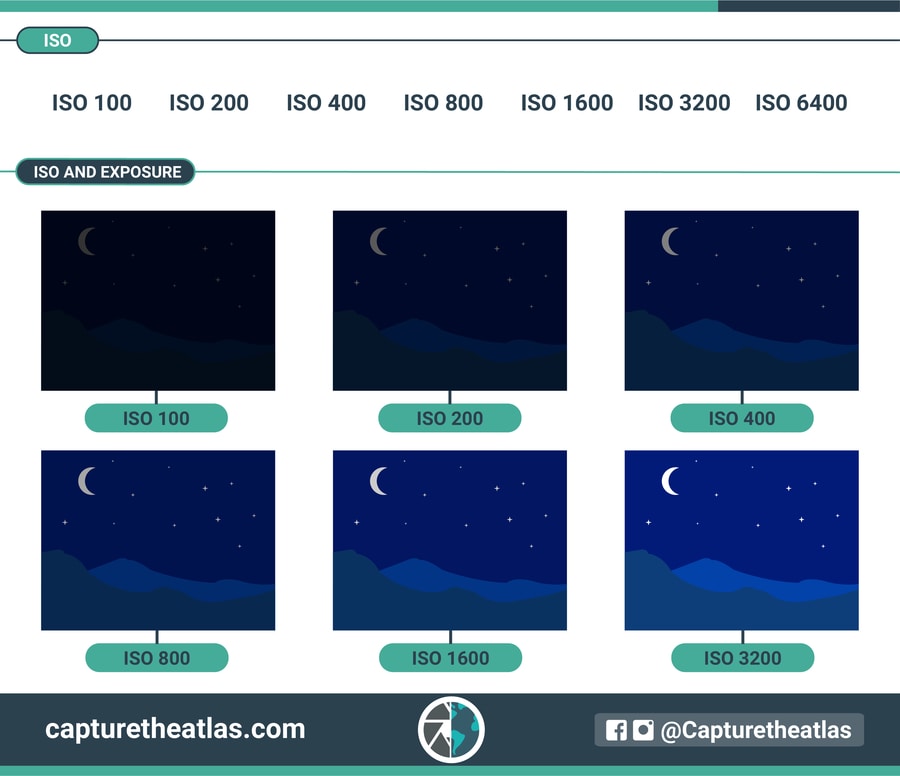
- ISO – Controls sensor’s sensitivity to light; affects image noise/grain.
- Example: ISO 100 in daylight (clear) vs ISO 3200 in low light (grainy).
Visual Exposure Triangle Chart on screen/board.
Hands-On Practice
-
Activity: “Light Hunt”
- Students pair up.
- Pick one object in the room or outside window.
- Take 3 photos of it, each time changing only one setting (aperture, shutter speed, or ISO) to see the difference.
- Encourage experimenting:
- Aperture: wide open vs narrow
- Shutter: fast vs slow
- ISO: low vs high
- Students pair up.
Homework
- Assignment: Take 3 different photos this week where you intentionally change one setting to get a different result.
- Label each photo with the setting changed (e.g., “Aperture f/2.8” or “Shutter 1/500”).